How to create ChatGPT-enabled Hubleto app
In this example we will show how easy an integration with ChatGPT can be implemented.
Initialize project
We are going to create the HubletoApp called ChatGpt. To do this, we first need to create an empty project:
cd /var/www/html/hubleto-chatgpt
composer create-project hubleto/erp-project .
php hubleto init
IMPORTANT We will be using
hubleto-chatgptfolder for this project. You may use anything else but do not forget to replace the folder in all examples.
Install required libraries
We will need some 3rd-party libraries for communicating with the OpenAI.
composer require openai-php/clientGet OpenAI API key
You need API key to identify your API requests. You can get one at https://platform.openai.com/api-keys
The API looks similar to this:
us-proj-G6eWLmDJq3QWqZe-QwYtLZpAnkOc2wDI4gkL37Gxh3T3BlbkFJ0sWqXn4LfpJyTT0iJRxCR6ZeoCjtIfbMXbyLRjGYYMwY447XZrYAsP2zSV0NjVSZRgUbPkNqgSkx4pjVfYrOo7j-uEvCt_dEYYcQ7EMqAACreate empty app
Now, with the project core ready, we can create an empty app called ChatGpt. It's as easy as this:
php hubleto create app ChatGpt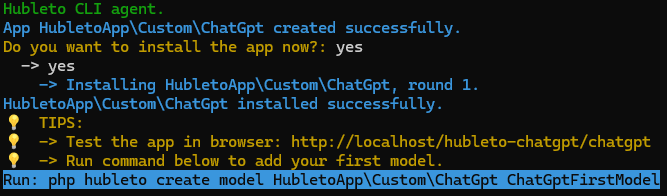
IMPORTANT You will find your new app in
/var/www/html/hubleto-chatgpt/src/apps/chatgpt. All app's files will be stored in this folder.
Modify the Home.twig
Each Hubleto app comes by default with Controllers/Home.php controller which uses the Views/Home.twig view. Now modify the default Views/Home.twig file and add a simple input to get the prompt and a form to submit the prompt. You may use the code below.
<h1 class="app-main-title">ChatGpt</h1>
<div class="card mt-2 p-2 w-full flex flex-col gap-2">
<form action="" method="POST">
<div>
<input
class="w-full"
name="prompt"
placeholder="Enter ChatGpt prompt here..."
value=""
/>
<button type="submit" class="btn btn-transparent mt-2"><span class="text">Go, ChatGpt, go!</span></button>
</div>
{% if viewParams.result %}
<div class="mt-4">
<code class="text-blue-800 bg-slate-50 p-2">{{ viewParams.result.choices[0].message.content }}</code>
</div>
{% endif %}
</form>
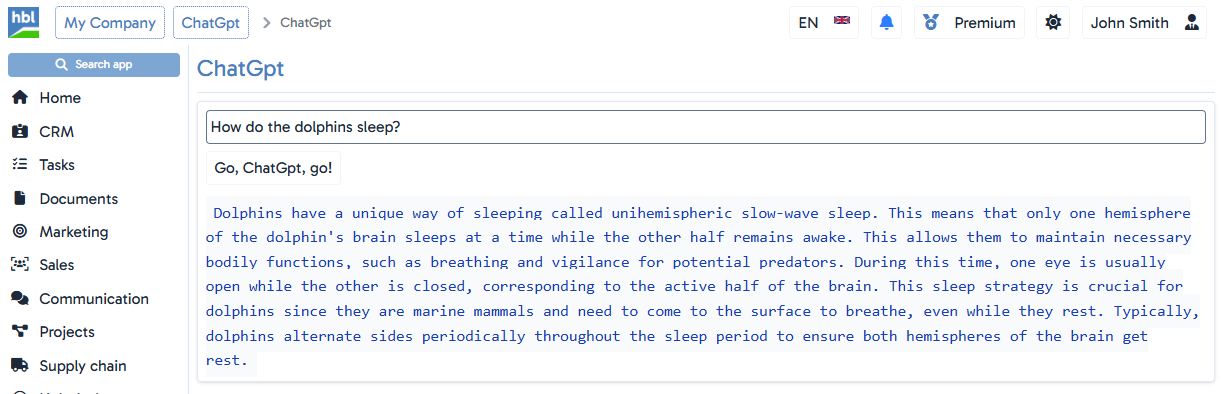
</div>Your new home screen is available at http://localhost/hubleto-chatgpt/chatgpt and should look like this:

Do the AI magic in Home.php controller
The Controllers/Home.php does the all AI magic. Replace the prepareView method in the controller with following content. Do not forget to replace your-openai-api-key with your real API key.
public function prepareView(): void
{
  parent::prepareView();
  $prompt = $this->router()->urlParamAsString('prompt');
  if (!empty($prompt)) {
    $client = \OpenAI::client('your-openai-api-key');
    $this->viewParams['result'] = $client->chat()->create([
      'model' => 'gpt-4o',
      'messages' => [ ['role' => 'user', 'content' => $prompt] ],
    ]);
  }
  $this->setView('@Hubleto:App:Custom:ChatGpt/Home.twig');
}
Test it now!
Now open http://localhost/hubleto-chatgpt/chatgpt, enter your prompt and enjoy chat with ChatGPT. :-)